We all know about thumbnails of images. They are thumb size preview of a picture. Basically, images or pictures are files and all file has their own icons. In most of the computers image thumbnails are displayed automatically instead of icons. Users don’t have to face any difficulties.
Sometimes for some settings change by mistake you can lose thumbnail preview of your images. Instead, they might show similar looking image icons. Disabling the thumbnail preview gives you some sort of security over the prying eyes.
In this easy guide you will learn how to enable or disable image thumbnail preview in Windows 7 and other versions.
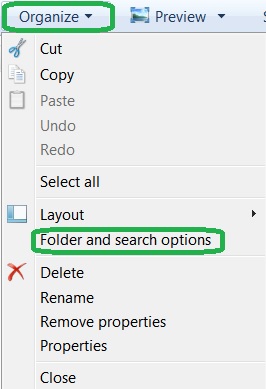
1. Open “Folder Options“. The easiest way to find, in your “Control Panel“. Another way is, from within a folder, select Organize > Folder and search options at top-left under the navigation bar.
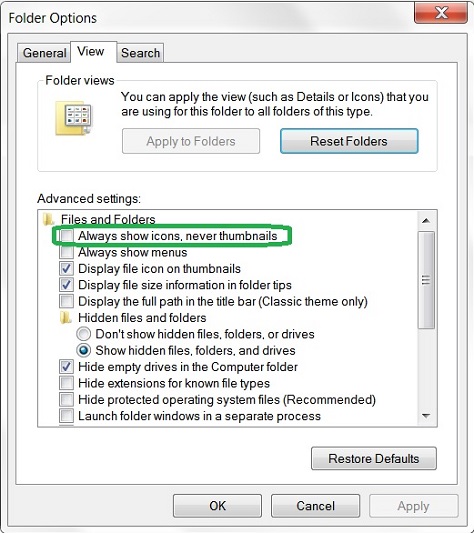
2. This will open a new window with plenty of options related to folders and search. You will find 3 tabs from the top. Select “View“.
3. In advanced settings area, check or uncheck “Always show icons, never thumbnails” depending your need and, apply the the changes.
You will also find some other useful settings here. Hope you enjoyed this small and easy guide to enable or disable image thumbnails in a folder. This will work on other Windows computers and laptops as well.


