What is AMP?
Accelerated Mobile Pages (AMP), loads of mobile pages super-fast, basically instantly. AMP HTML, a new HTML markup, started off recently as an approach from Google to make the web faster. AMP does all the optimizations and renders the pages without blocking resources. It is 4 times faster than your conventional mobile page loads. An AMP HTML page starts with <html ⚡> and will just display /amp/ at the end of every URL. This article is to show you how to enable Accelerated Mobile Pages (AMP) in your WordPress site or blog. To know more visit the AMP Project website.
How to Enable AMP on WordPress?
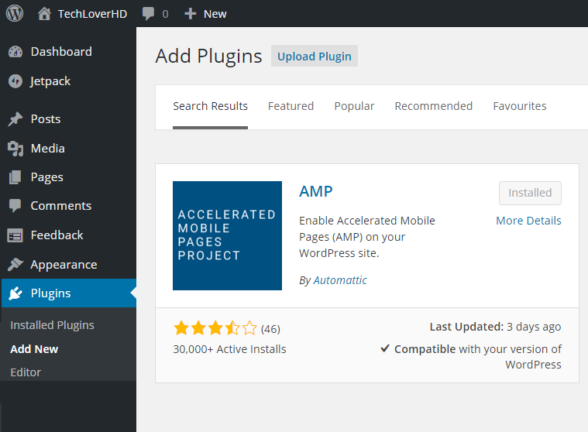
Adding AMP on WordPress is very easy as they are taking part in the development as well. Automattic, released a plugin called AMP for WordPress sites. You can either download and FTP in your site or use the WP Plugins admin page to install it from the repository. For enabling it via your dashboard follow the below steps.
- Click on Plugins > Add new
- Search for “AMP” without the quotes
- Install and Activate the AMP plugin developed by Automattic
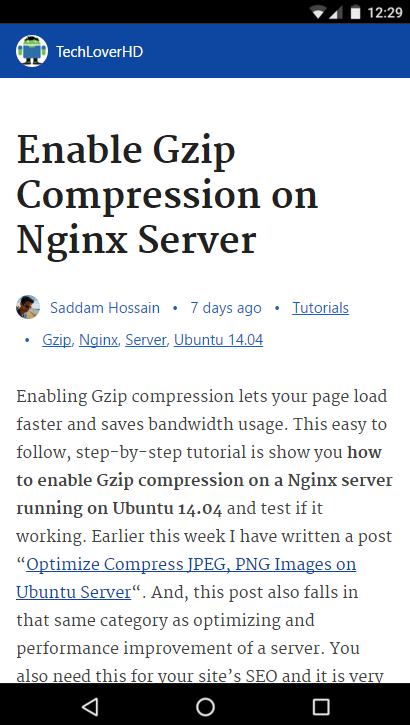
Installing and activating the plugin will take care of everything. It should automatically change your HTML markup of every blog post and include a link of the AMP page. Just visit a blog post page and add “/amp/” at the end without the quotes. e.g.: https://techloverhd.com/2016/03/enable-gzip-compression-nginx-server/amp/. The page looks like below on a Nexus 5X phone.
AMP Reporting in Google Search Console
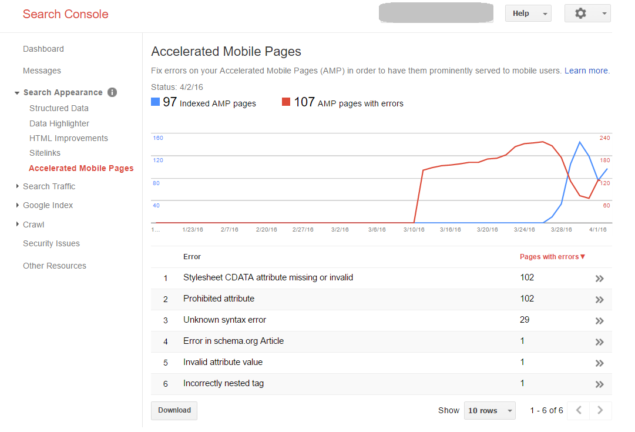
After activating AMP on your site, it will take few days for Google Search Console to start reporting on it. You can check how many AMP pages currently indexed and how many pages with error and types of errors. Below is a screenshot of AMP Pages inside Google Search Console.
Next step is validating your AMP pages and customizing it to match the color scheme of your theme.


